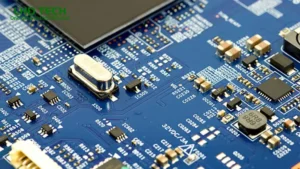
Introduction: Why You Need a Multimeter to Test a PCB Board
Every pcb board—from the simplest timer circuit to the most complex smartphone—relies on flawless interconnection and component. Yet, manufacturing errors, wear and tear, and user accident are unavoidable. That’s why a multimeter is an indispensable tool for circuit board and electronic device troubleshoot. Whether you’re a beginner or an expert, you know how to use a multimeter to test a circuit board is the first step in save time, money, and frustration during repair or DIY project.
With a multimeter, you can do more than just test a PCB: you can measure voltage level (both DC and AC), troubleshoot short circuit, verify continuity, track down faulty capacitor or resistor, and even test for incorrect or missing solder joint. Proper PCB testing not only identifies fail parts but also confirms the integrity of a repair—and prevents future failure.
How to Troubleshoot PCB with Multimeter: Every Step Explained

When your electronic device malfunction, your multimeter is essential for diagnosing the problems. Here’s an overview checklist for effective PCB troubleshoot:
- Visual Inspection: Look for burnt components, corrosion, or misplaced components.
- Check Power Source: Use the multimeter to measure DC voltage; ensure boards receive correct voltage.
- Continuity Testing: Verify trace and connection are intact. Check for open circuit using the continuity mode.
- Component Verification: Test resistor, capacitor, and diode on the board with multimeter for significant deviation from expected value.
- AC Voltage and Current: For circuits using AC, switch the multimeter to AC voltage or current mode.
- Mark and Isolate Faults: Note suspicious reading on a schematic or photo; isolate and re-test after each repair.
Common Troubleshooting Tasks with a Multimeter
| Task | Multimeter Setting | Expected Result |
| Test power supply (DC) | DC Voltage Mode | 3.3V, 5V, 12V, as per spec |
| Check continuity | Continuity / Resistance | Beep or <2 ohms |
| Find short circuit | Continuity / Low Resistance | Beep or near 0 ohms |
| Check resistor value | Resistance Mode | Within 5% of label/coding |
| Test an electrolytic capacitor | Capacitance/Resistance/Diode | μF rating or brief low resistance, then OL |
| Test a diode/LED | Diode Test Mode | 0.53V (LEDs by color) |
Essential Guide on How to Test a PCB with a Multimeter

If you want to know how to test a pcb, follow these step:
1. Power Off and Safety First
- Disconnect the power source. If the test require power (voltage measurement), use insulated probe and one hand to avoid electrical shock.
2. Visual & Schematic Check
- Inspect for burnt component, bad soldering, or misplaced component. Use the board’s schematic to identify expected value and trace signal path.
3. Set the Multimeter
- For resistance or continuity, ensure the multimeter is set to the correct test mode.
- To measure voltages, switch the multimeter to the right range: use DC or AC depending on the circuit specification.
4. Use the Multimeter to Test Each Section
- Mark each tested area on your schematic or board with a washable marker. This prevents repeated tests and missed areas.
Setting the Multimeter: Voltage, Continuity, and Resistance Modes
Understanding how to set your multimeter is crucial to avoid damage and get accurate readings:
- Set the Multimeter to Voltage Mode: Use V⎓ for DC circuits like computer boards, battery circuits, or most digital PCBs. V~ (V with a sine wave) is for AC voltage circuits.
- Set the Multimeter to Resistance Mode: Look for the ‘Ω’ symbol. Use this to test resistors, traces, and sometimes for open/short detection.
- Set the Multimeter to Continuity Mode: This mode emits an audible beep for low resistance (<30Ω in most meters), saving time when testing long traces.
- Switch the Multimeter to Capacitance or Diode Test: For advanced diagnostic, use “diode” mode for diodes/LEDs and “capacitance” for capacitors—these test modes are often combined in digital multimeters.
Placing the Probes: Measuring AC and DC Voltage on PCB Boards
When measuring voltages on a circuit board with a multimeter, always place the black probe on the ground (or negative battery terminal). The red probe measures the node of interest:
- For DC voltage, check main power rails first (3.3V, 5V, 12V).
- For AC voltage, use the AC (V~) setting, often for relay coils, transformer pins, or line-powered circuits.
- Low or unexpected voltage levels often pinpoint regulation issues, faulty regulators, or power distribution faults.
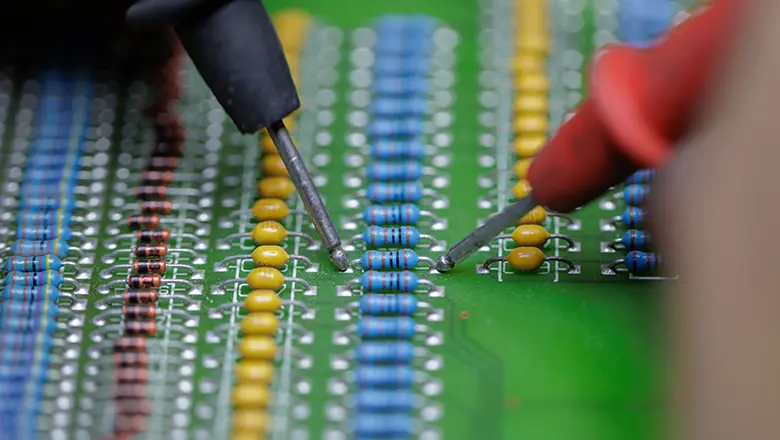
Checking Continuity & Resistance: Troubleshooting with a Board with Multimeter
Continuity testing locates faulty or broken traces. Ensure the multimeter is in continuity mode—when you place the probes across a trace or joint, a beep confirms the path is closed (low resistance).
Resistance Testing Steps
- Remove power from the circuit.
- Set the multimeter to the lowest Ω range or auto range.
- Place the probes across the component or trace.
- Low resistance reading indicates a good connection; “OL” means an open circuit.
Quick Reference Table
| Component Tested | Place Probes Across | Typical Reading |
| Good Trace | Pads or ends | <2Ω |
| Open Trace | Pads or ends | “OL” or >1kΩ |
| Resistor | Both leads | Labeled value |
| SMD Resistor | Both contacts | Check code vs result |
| Solder Joint | Pad and component | <1Ω |
Testing Capacitors and Diodes: Deep Dive into PCB Component Analysis
Capacitors and diodes can silently fail—here’s how to use a multimeter for proper testing:
Testing Capacitors on a PCB Board
- Resistance Mode: An electrolytic capacitor will first show low resistance, then gradually rise (“charging”) to OL. If it shows continuous low resistance, the capacitor is shorted. If always “OL,” it is open.
- Capacitance Mode: With one leg lifted (if possible), place the probes across the capacitor—the display should match the part’s rated value (check for significant deviation).
Testing Diodes/LEDs using the Diode Test Mode
- Diodes should read ~0.6V (silicon) with red on anode, black on cathode—reverse should give OL.
- If both directions read 0 (zero) or a very low resistance, the diode is shorted and must be replaced.
- For LEDs, forward voltage will be higher (typically 1.8V to 3V depending on color and type). Again, reverse should be OL.
Faulty Capacitor Case Study
A failed amplifier board was traced to a faulty capacitor using the multimeter’s capacitance mode. The cap read less than 10% of its rated value—in-circuit, the board showed a low resistance reading, indicating the cap had failed as a partial short. Replacing it restored audio function and prevented a costly power supply replacement.
How to Use the Multimeter: Probe Techniques and Best Practices

Proper probe technique is vital for both safety and test accuracy when working on a pcb board with a multimeter.
Best Probe Practices
- Use insulated test probes for extra protection, especially when measuring voltage in a powered circuit or near AC voltage.
- One probe at a time: Steady the black probe on ground, then use the red probe to explore suspect pad, pin, or trace as you observe reading.
- When takeresistance or continuity measurement, ensure the multimeter is set to the proper mode and that the board is unpowered.
- For densely packed or SMD PCB, use needle-point probe or fine-tip test probe.
- Place the probes across the component and make sure you have clean, solid contact; dirty or oxidized surfaces can cause false readings or intermittent contact.
Using the Multimeter to Measure Voltage
- Always ensure the multimeter is set to the correct voltage type (DC or AC) before starting.
- For DC circuit: Black probe to ground, red probe to the test point.
- For AC voltage: Use only double-insulated, high-voltage-rated probe. Measure from hot to neutral or neutral to ground.
Advanced PCB Testing: Identifying and Repairing Faulty Components
Stepwise Approach to Troubleshooting PCB Board with Multimeter
- Start with Power: Measure supply rails and verify voltage levels at main connectors and IC power pins.
- Probe Critical Circuit Node: For example, check microcontroller pins, analog signal paths, and switching transistor terminals using continuity and voltage readings.
- Test Mode Progression: Begin with continuity and resistance, then switch the multimeter to voltage or diode mode as needed.
- Low Resistance and Short: A low resistance reading indicates a possible short circuit—especially if observed between power and ground planes.
- Find Faulty Components: If you get odd values from in-circuit checks, lift one lead and re-test the component.
Frequently Asked Questions About How to Test PCB Board with a Multimeter
Q: Can you use a multimeter to test a pcb even without a schematic?
A: Yes! Even if you lack a full schematics, you can use continuity, resistances, and voltage measurement to troubleshoot major fault, provided you’re aware of basic PCB layout convention (ground planes, power rails, input/output layout).
Q: Why does my multimeter read “OL” or “1” in resistance mode?
A: “OL” (Overload) or “1” mean the resistance is higher than the maximum range, usually signifying an open circuit or non-connected pad.
Q: When should I use diode test mode on a pcb with a multimeter?
A: Use diode test mode whenever you need to verify the health of diodes or LEDs. This mode provide a small current, read forward voltage, and expose short/open that resistance mode can miss.
Q: How do I avoid damaging component during testing?
A: Ensure the multimeter is set correctly for each test. Never measure resistance or continuity on a live-powered board, and avoid excessive probe pressure on SMD component.
Conclusion: Why a Multimeter is Essential to Test a PCB Board
The ability to test a PCB with a multimeter turns uncertain guessing into precision circuit board troubleshooting. No matter how advanced electronic devices or circuit board designs become, the basic skill to use a multimeter to test, confirm, and verify every connection and component remains a foundation of electronics.
By following this guide on how to test PCB board with a multimeter, you can:
- Catch faulty capacitors, resistors, and soldering errors before they become costly returns.
- Use the multimeter in resistance mode to find open traces and broken pads.
- Confirm DC and AC voltage levels for stable circuit operation.
- Set the multimeter in test mode for continuity and diode verification, swiftly identifying weak points.
- Troubleshoot issues confidently in both simple hobby circuits and advanced digital PCBs.