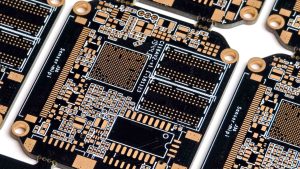
Why Clean Circuit Boards? The Purpose and Process

In the field of PCB assembly, maintenance and repair, LHDT TECH is well aware of the importance of thoroughly cleaning circuit boards. We have handled a large number of cases of performance degradation, overheating and corrosion caused by pollution – dust and dirt not only hinder heat dissipation and retain moisture, but may even cause corrosion of the PCB surface to conduct electricity, posing a risk of short circuits. Therefore, LHDT TECH insists on implementing strict cleaning processes before production, after rework and when repairing old equipment to ensure the reliability and long-term stable operation of each handled circuit board.
Purpose of cleaning:
- Remove thermal insulation dust to ensure heat dissipation efficiency and prevent components from overheating.
- Completely remove the residual flux after soldering to eliminate the risk of electrochemical migration and short circuit caused by ion contamination.
- Neutralize and remove corrosive contaminants to protect precision circuits, pads and component pins from erosion.
- A protective layer is formed on the clean surface to build a long-lasting barrier for the circuit board against future contamination.
Through the above targeted treatments, we ensure that each circuit board reaches the best state in terms of electrical performance, reliability and long-term stability.
Types of PCB Contamination

Understanding the types of PCB contamination greatly improves the cleaning process. Not all contaminants are equal, so knowing how to clean each type is vital for safe cleaning.
Dry Contaminants
- Dust:The most common and one of the easiest to remove dust from a PCB. Accumulates quickly and can cause circuit boards to get dirty.
- Debris and Fibers:From environment or manufacturing.
- Solder splatters:May appear during rework or PCB assembly.
Wet & Ionic Contaminants
- Soda, coffee, salty water:Spills introduce conductive ions.
- Fingerprints and skin oils:Attract dust and enable corrosion.
Flux Residues
- Left after soldering, often contain acids that cause corrosion.
- Types include rosin, no-clean, water-soluble.
Corrosion
- Corrosion on circuit boards occurs from humidity, water, or leftover ionic contamination.
- Aggressively attacks copper traces, component leads and PCB pads.
Types of PCB Contamination and Cleaning Methods
| Contamination Type | Common Cause | Best Cleaning Solution / Method |
| Dust/Debris | Airborne, storage | Compressed air, anti-static brush |
| Flux Residue | Soldering, rework | Isopropyl alcohol, PCB cleaner |
| Wet/Ionic | Spills, sweat, flood | Deionized water, isopropyl alcohol, thorough drying |
| Corrosion | Moisture, salts, battery leak | Baking soda paste, IPA, vinegar, manual cleaning |
Preparing to Clean a Circuit Board Safely
For LHDT TECH, safe cleaning begins with perfect protection. We insist on conducting a comprehensive assessment and protection of the circuit board before cleaning to ensure its integrity. This is the key for us to achieve safe and effective cleaning, and it is the standard action for every operation.
To ensure the absolute safety and precise effectiveness of PCB cleaning operations, LHDT TECH requires that the following pretreatment procedures must be strictly followed before any operation is carried out: Firstly, complete energy isolation including power-off and battery removal, and establish a complete ESD protection system composed of wristbands and anti-static floor MATS. Remember a few key actions: Be sure to wear gloves when operating and place the board in a clean environment with appropriate temperature and humidity. Then, in a well-lit area, carefully examine the board to determine whether the dirt is dust, welding slag or something else. Also, remember to use tape to cover the speaker holes, interfaces and other areas that are prone to liquid ingress for protection first.
Essential Tools and Cleaning Products for PCB Cleaning
Professional and right cleaning tools are the foundation for ensuring the reliability of the process and the effectiveness of cleaning. The following is the list of standardized tools and materials adopted by LHDT TECH for PCB cleaning:
Cleaning Tools Table
| Tool/Supply | Used For | Extra Tips |
| Compressed air | Remove dust from a PCB | Short bursts; avoid overcooling |
| Anti-static brushes | Manual cleaning, scrubbing the circuit board | Choose firm yet gentle bristles |
| Lint-free wipes | Cleaning and drying PCB surfaces | Avoid fiber-based products |
| Foam/cotton swabs | Spot cleaning, cleaning under components | Foam swabs leave less lint |
| Isopropyl alcohol | Universal PCB cleaning solution | Use 99% for best drying |
| Deionized water | Wet cleaning, rinsing after paste/acid | Always dry boards thoroughly |
| PCB cleaner/flux remover | Removing flux residues | Electronics-specific only |
| Baking soda | Neutralizing battery or acidic corrosion | Rinse to prevent white residue |
| Ultrasonic cleaning machine | Cleaning complex/dense boards | Electronics-grade solution only |
Methods for Cleaning Printed Circuit Boards

There are several ways to clean PCB safely and effectively, depending on the nature of contamination. Let’s review the most common ways to clean and the instructions on how to clean a printed circuit board.
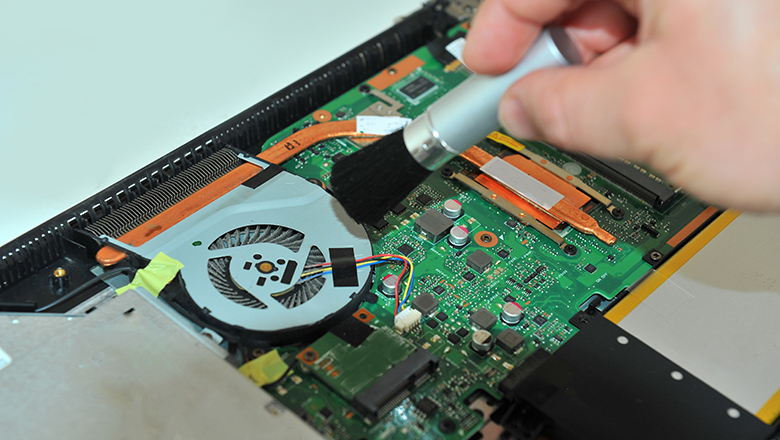
Remove Dust from a PCB (Manual Cleaning)
Manual cleaning is often the best way to clean dry contaminants and debris:
After cutting off the power and removing the board, first use anti-static compressed air to blow away the floating dust from the center to the outside. Then, use a soft brush to clean the accumulated dust around the chips and interfaces. Next, use an anti-static vacuum cleaner to thoroughly remove the residue. Finally, check under sufficient light to ensure that the board surface is completely clean.
Wet Cleaning (Ionic Residues, Spills)
During the actual operation, please remember that after dealing with stubborn stains, ion contamination, or using “folk methods” like baking soda or white vinegar, the board must be thoroughly rinsed and dried; otherwise, it will definitely cause future problems. In simple terms, it involves three steps: First, rinse off all residues with deionized water; Then, use high-purity alcohol (IPA) and a lint-free cloth to wipe the hard-to-reach corners clean. Finally, blow it once with dry air and then put it in an oven at a low temperature of no more than 65℃ to dry thoroughly. Only in this way can it be truly handled and secondary corrosion or short circuits be avoided.
Spot Cleaning and Targeted Techniques
For the cleaning flux residues after soldering, LHDT TECH adopts a selective local cleaning process. The core of this process is to use a dedicated flux cleaner or high-purity isopropyl alcohol (IPA) to precisely clean the solder joints and the surrounding areas, preventing the solvent from extensively soaking the circuit board.
The key points of the process are as follows:
- Precise liquid application: Only fixed-point treatment is carried out on the solder joints and residual areas that need to be cleaned.
- Area protection: For sensitive components, signs and connectors around, high-temperature tape should be used in advance for shielding and protection.
- Controllable operation: Use cotton swabs or lint-free cloths for directional wiping to ensure the cleaning effect while maximizing the control of solvent diffusion range and dosage.
How to Clean Flux Residues
Flux residues are a frequent contaminant after rework or repair,When cleaning flux residue, remember this sequence:
First, determine whether the dirt is rosin, alcohol-free or water-soluble, and choose the right cleaning agent. Then precisely apply high-purity alcohol or a special cleaning agent, and make sure it doesn’t spill everywhere. Then, use an anti-static cotton swab or a soft brush to gently wipe off the dissolved residue in one direction. Immediately absorb it clean with a lint-free cloth after wiping to prevent it from sticking back. Finally, check under white light and repeat the wiping process until the board is neither visibly dirty nor completely dry. This way, it’s both clean and won’t damage the board.
Best practice: Clean flux residues as soon as possible after soldering to prevent hardening and corrosion.
How to Clean a Corroded Circuit Board

Among all the types of pollution on PCBS, electrochemical corrosion on circuit boards is the most harmful one. The causes are complex, usually resulting from high humidity environments, liquid splashes, battery leakage, or ionic contaminants remaining due to incomplete cleaning in the early stage. If not intervened in time, corrosion will continue to erode the component pins, damage the electrical connectivity of the circuit board, and eventually lead to the failure of the entire board’s function.
Step-by-Step: Cleaning Corrosion from a PCB Safely and Effectively
Materials:
Cleaning agents
- High-purity isopropyl alcohol (IPA, 99% concentration) : Used for dissolving organic residues and fluxes.
- Baking soda (sodium bicarbonate) : Specifically used for neutralizing and cleaning acidic corrosive substances such as battery leakage.
- High-purity deionized water/distilled water: used for rinsing and preparing cleaning solutions.
Tools and consumables category
- Anti-static cleaning brush (or old toothbrush specifically designed for electronic cleaning) : used for physical scrubbing.
- Lint-free cloth/anti-static foam cotton swab: used for wiping and adsorbing dissolved contaminants.
- Dry compressed air: Used for quickly drying liquids on surfaces and in crevices.
- Illuminated magnifying glass: For detailed inspection and effect verification before and after cleaning.
Cleaning Process:
Assess and Prepare—Mechanical Removal—Baking Soda Paste (for Battery or Acid/Flood Leaks)—Rinse and Remove Residue—Alcohol Cleaning—Dry Completely—Inspect
The specific classification steps are as follows:
To deal with circuit board corrosion, a seven-step closed-loop process must be strictly followed: completely cut off the power and remove the battery before operation, and assess in an anti-static environment; Then, use an anti-static soft brush to remove loose and corrosive substances; In case of acidic corrosion such as battery leakage, apply a neutralizing paste made of baking soda and deionized water, let it stand for 10 minutes and then completely remove it. Use deionized water for repeated rinsing throughout the process. Tap water is strictly prohibited. Then, high-purity IPA and anti-static cotton swabs are used for precise wiping at fixed points. Then, absorb the liquid with a lint-free cloth, blow with dry air, and deeply dry in an oven at a temperature of ≤65℃. Finally, conduct a comprehensive inspection under a magnifying glass. If the standards are not met, repeat the corresponding steps until all corrosion is completely removed and the board surface is completely dry.
Ultrasonic Cleaning: For Delicate and Complex PCBs
Ultrasonic cleaning is an efficient and deep cleaning process adopted by LHDT TECH for high-density assembly, BGA packaging or precision PCBS with hidden contamination that are difficult to reach by manual cleaning.
What Is Ultrasonic Cleaning?
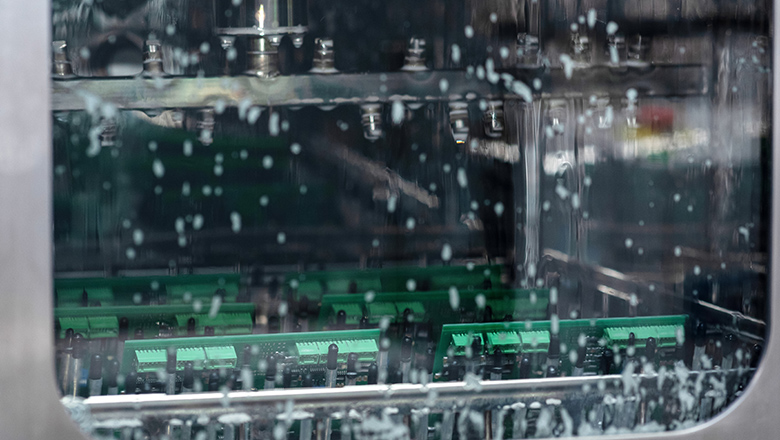
Its principle is very simple: First, use ultrasonic cleaning machine at the cleaning solution to generate countless tiny bubbles; Then, at the moment these bubbles burst, they generate a tiny impact force that can penetrate into all the invisible crevices and the bottom of components, thoroughly peeling off the stains.
How to Use Ultrasonic Cleaning on Circuit Boards
- Prepare the Machine:Inject deionized water into the cleaning tank and add dedicated electronic cleaner or neutral PCB cleaning solution as per the process specifications to prepare the optimized cavitation working medium.
- Remove Sensitive Components: Before operation, all non-sealed sensitive components (such as batteries, speakers, relays) must be removed to prevent physical damage or performance impact caused by ultrasonic cavitation.
- Start the Cleaning Process:Immerse the circuit board completely in the prepared cleaning solution. Based on the nature of the contaminants, the density of the board components and the complexity of assembly, set an ultrasonic cleaning cycle of 2 to 8 minutes. This parameter range has been verified to be applicable to the vast majority of modern PCBS.
- Post-Clean Rinse:After cleaning, fresh deionized water must be used immediately for a full rinse to thoroughly remove dissolved contaminants and residual cleaning solution, and prevent secondary deposition.
- Drying:The staged drying process is adopted: first, filtered and dried compressed air is used to blow the surface and crevices in a directional manner, and then it is transferred to a precision oven at a temperature of ≤65℃ for low-temperature and long-lasting drying to ensure that the moisture inside the substrate and between layers is completely evaporated.
Best Practices: Keeping Circuit Boards Clean
Based on long-term professional experience, LHD TECH is well aware that the daily maintenance of the system is the core to ensuring the long-term reliable operation of PCBS. For this reason, we have established the following standardized maintenance and long-term care system:
Keeping Circuit Boards Clean
Based on in-depth research on the reliability of electronic components, LHDT TECH has established the following systematic PCB preventive maintenance and long-term protection system, aiming to maximize the service life and stability of circuit boards through standardized operations:
| Maintenance stage | Core measures and process standards |
| Regular Inspection | Establish a regular visual inspection system every 3 to 6 months, with a focus on dust accumulation, moisture absorption and initial signs of corrosion. In harsh environments such as high temperature, high humidity or much dust, the testing cycle should be shortened to 1 to 3 months. |
| Proper Storage | The cleaned PCB must be sealed in an anti-static shielding bag and stored with a humidity indicator card and desiccant. The long-term storage environment should be controlled in a clean space with a temperature of 15 to 30℃ and a relative humidity of no more than 60%. |
| Safe Handling | Operation norms and pollution prevention: Throughout the operation, powder-free nitrile gloves must be worn, and only the edges of the board are allowed to be held. It is strictly prohibited for hands to directly touch the pads, pins and the surface of the package to fundamentally eliminate grease and ion contamination. |
| Periodic Cleaning | Regularly use dry, filtered compressed air and anti-static soft brushes to perform non-contact dust removal around the heat sink, interfaces and large components to prevent reduced heat dissipation and electrochemical risks caused by dust accumulation. |
| Prompt Spill Response | In the event of sudden contamination such as liquid splashing, emergency procedures must be initiated immediately: rinse with deionized water and then neutralize and perform final cleaning with high-purity IPA. Any delay is strictly prohibited. |
| Use Protective Coating | For PCBS that are continuously exposed to high humidity, salt spray or industrial chemical environments, it is recommended to apply conformal coatings that comply with the IPC-CC-830B standard to form a long-lasting and reliable isolation barrier. |
Troubleshooting, Tips, and Common Mistakes
Based on the practical experience of our, even if a safe cleaning process is followed, specific problems may still be encountered. We have established the following systematic problem-solving solutions and preventive measures:
Troubleshooting Common Cleaning Issues
| Problem phenomenon | Root cause analysis | Professional solutions and preventive measures |
| Sticky residue remains after cleaning | The organic flux is not completely dissolved, or the polarity of the cleaner does not match. | 1. Use high-purity IPA (≥99%) and brand-new lint-free cloth for secondary fixed-point cleaning; 2. If it is ineffective, a strong polarity dedicated PCB cleaner should be used instead. 3. Prevention: Accurately identify the type of flux and select the corresponding solvent before cleaning. |
| White, powdery film appears after drying | Ionic contaminants (such as neutralization products or salt in the cleaning agent) were not thoroughly rinsed, and the residual water evaporated and crystallized. | 1. Rinse thoroughly immediately with fresh deionized water; 2. After it is completely dry, wipe it with IPA to remove water marks. 3. Key point: Do not use tap water and ensure that the rinsing water flow is fully covered. |
| Corrosion returns quickly | The previous cleaning was not thorough and/or the environmental humidity was too high (RH > 60%), which led to the persistence of electrochemical corrosion. | 1. Thoroughly clean and ensure that the corroded area is completely dry (it is recommended to deep dry at a low temperature of ≤65℃); 2. Store the PCB in a humidity-controlled environment (RH < 40% is recommended); 3. Long-term protection: It is recommended to apply conformal coating in harsh environments. |
| Traces or pads are damaged | The cleaning operation was too rough, with the use of improper hard tools or excessive scraping. | For precision areas, only non-contact or extremely gentle handling with anti-static soft bristles is allowed. 2. It is strictly prohibited to use metal brushes, nails or ordinary hard-bristled brushes. 3. Principle: Always adhere to the principle of “starting from the light to the heavy and evaluating before operating”. |
Common Mistakes Table
| Mistake | Potential Damage | Safer Alternative |
| Using household chemical cleaners | Damages plastics, traces | PCB-specific cleaner, IPA |
| Skipping anti-static precautions | Static discharge, component failure | ESD strap, mat, non-static brush |
| Not drying thoroughly before applying power | Electrical shorts, quick corrosion | Air/oven drying, confirm dryness |
| Rushing cleaning process | Missed contamination, repeat failures | Step-by-step, inspect after each stage |
| Over-scrubbing or using hard brushes | Lifts pads, scratches traces | Soft/ESD-safe brush, gentle cleaning |
| Powering up with active residue present | Component destruction | Inspect & test with a multimeter |
Frequently Asked Questions
How often should I clean printed circuit boards safely?
Family environment: Conduct it once every 6 to 12 months.Industrial environment: Conduct it once every 1 to 3 months, depending on the specific working conditions.
Is ultrasonic cleaning safe for all electronic circuit boards?
It is applicable to most modern sealed PCBS, but for precision, special or circuit boards with non-sealed components, compatibility needs to be confirmed in advance.
What should I use to clean flux residues?
It is recommended to use high-purity isopropyl alcohol (IPA) or a dedicated PCB solder cleaner. After cleaning, it must be wiped clean with a lint-free cloth.
Is it okay to use water to clean a PCB?
Only deionized water or distilled water can be used. Tap water is strictly prohibited. It must be thoroughly dried after cleaning before being powered on.
What is the safest way to dry a PCB after cleaning?
First, blow off the clear liquid with compressed air, then dry it in a low-temperature oven at 50-65 ℃ for 1-2 hours. Before use, make sure it is completely dry.
When do I need to clean my PCB during assembly?
Cleaning should be carried out after each welding process and before the final assembly to remove contaminants such as flux and dust, ensuring welding quality and long-term reliability.
Can I damage the circuit board if I clean it too much?
Excessive or improper physical cleaning (such as hard brushing or strong grinding) may damage the circuits or pads. The principle of “moderate and effective” should be followed.
Do I need to clean a newly purchased PCB?
It is recommended to conduct inspections and, if necessary, carry out cleaning to remove dust and ionic contaminants that may have adhered during production or storage and transportation.
What causes corrosion to come back after cleaning?
It is mainly caused by incomplete cleaning, inadequate drying or excessively high environmental humidity. It is recommended to store with anti-static bags and desiccants. In harsh environments, conformal coatings can be applied.
What’s the difference between cleaning electronic circuit boards with IPA and other cleaners?
IPA evaporates quickly and leaves little residue, making it safe for most PCB materials. Other non-specialized cleaning agents may contain corrosive components or residues and are not suitable for precision electronic cleaning.
Advanced Guidance: PCB Cleaning Techniques for Specialized Boards
- High-density or surface-mount PCBs:It is recommended to use IPA and foam swabs for fixed-point cleaning. For blind spots such as below BGA/QFN, ultrasonic cleaning can be considered, but compatibility and safety tests must be conducted first.
- Boards with conformal coating:When cleaning, avoid damaging the existing coating. If the coating is damaged or needs to be removed for thorough cleaning, it must be reapplied as required after cleaning and drying.
- PCBs with sensitive ICs or micro-electromechanical systems (MEMS):Before cleaning, sensitive components must be shielded and protected. Soaking or using ultrasonic waves is strictly prohibited unless explicitly permitted by the manufacturer.
- Multi-layer PCBs:The drying time needs to be significantly extended to ensure that the moisture between layers and within the holes is completely evaporated, so as to guarantee the accuracy and long-term reliability of the test.
Protect Your Circuit Boards For the Future
- Routine Maintenance:Keeping circuit boards clean is a vital part of reducing unplanned repairs, increasing reliability, and maximizing performance—no matter the type of PCB.
- Choose the Right Cleaning Tools Like anti-static brushes, compressed air, and proper cleaners designed for cleaning printed circuit boards.
- Learn How to Clean With Confidence:Always consult manufacturer recommendations and use safe cleaning solutions.
- Document Each Cleaning Process:This builds records for PCB assembly QA, warranty, or resale.
Conclusion
Cleaning printed circuit boards is not just an afterthought in electronics care—it’s an essential process for long-term device performance, component safety, and reliability. When you need to clean a PCB, follow safe and effective cleaning techniques. Use the right cleaning products and tools for cleaning printed circuit boards, and understand that preventative cleaning to remove dust or clean flux residues will save time and money in the future.
By learning how to clean circuit boards safely and effectively, you protect your investment, prevent corrosion on circuit boards, and extend the life of every electronic circuit board in your workbench or lab. From manual cleaning and spot cleaning to ultrasonic cleaning, there are several ways to clean PCBs, each tailored to different types of PCB contamination. Proper cleaning, thorough drying, and regular inspection are the most effective ways to keep circuit boards clean and operating at peak performance.
Remember:
- Safe cleaning is effective cleaning.
- Inspect boards before and after cleaning.
- Use gentle, electronics-approved cleaning solutions like isopropyl alcohol for most applications.
- Be patient—never rush the process.
- Develop a routine for cleaning your PCBs as part of PCB maintenance best practices.
A clean circuit board is a reliable circuit board. Following the right cleaning process not only removes existing contamination but also helps protect your circuit boards from future issues.