Introduction

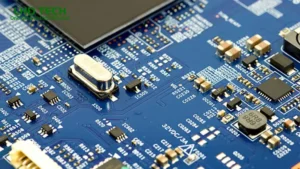
The printed circuit board (PCB) serves as the physical substrate for all modern electronic circuits. Professionals in the manufacturing industry recognize that factors determining board performance extend beyond the quality of copper traces and solder joints. Clear, unambiguous labeling and convenient component identification directly impact the final quality of the circuit board, production efficiency and the feasibility of long-term product maintenance. The silkscreen layer on the PCB surface is precisely the critical process step designed to achieve this objective.
The silkscreen layer is the outermost graphic layer covering the PCB surface, with core functions including labeling component reference designators and polarity, marking test point locations, providing safety warnings and printing brand logos. This layer is produced using specialized screen printing technology and plays an essential and irreplaceable role in the overall PCB manufacturing process. For PCB designers, assembly personnel and maintenance engineers, high-quality silkscreen markings directly determine the smoothness of production and maintenance—clear markings significantly enhance assembly efficiency, while unclear or missing markings often lead to debugging difficulties and unnecessary rework time.
Throughout this guide, we’ll walk you through everything about silkscreen—what it is, why it’s essential, how it’s created and the tips you need for quality of the PCB and best silkscreen design in your next project.
What Is Silkscreen on a PCB?

The PCB silkscreen layer (also known as the screen printing layer) is a critical component of the circuit board designand manufacturing process, physically manifested as the ink graphics and text printed on the surface of the finished PCB. These markings serve not merely decorative purposes but, more importantly, function as essential identifiers that guide circuit board assembly, testing and facilitate user understanding of the circuit’s functionality.
The silkscreen layer is a functional coating composed of insulating epoxy ink, which is applied to the surface of PCB substrates such as FR-4 fiberglass. The printing location of this ink layer is determined by the actual layout and assembly requirements of the circuit board; it may be applied only to the top or bottom layer, or to both sides of the board simultaneously. Traditional production processes typically employ standard ink colors such as white, black or yellow. The primary purpose of these colors is to create sufficient contrast with the underlying solder mask, thereby ensuring clear visual legibility of the markings.
Why Use a Silkscreen on a Printed Circuit Board?
- Ensure easy and fast component identification.
- Show markings for polarity, pin 1 and orientation.
- Indicate all test points for quality control.
- Provide symbols, warnings and operation notes.
- Show company logos, serial numbers and certifications.
- Improve assembly yield and ease PCB troubleshooting.
Silkscreen on PCB is a must for both complex, high-reliability PCBs and even simple DIY or quick-turn PCB prototypes.
Why Silkscreen Is the Topmost Layer in PCB Design
Silkscreen is the topmost layer because it is the last to be applied after solder mask and copper tracks are in place—making all vital information visible on the finished PCB board. The silkscreen layer rests directly on top of the pcb surface, ensuring no marks or instructions are obscured by other layers or future mounting steps.
Key Functions of the Top Silkscreen Layer:
- Label placement and orientation for components on the PCB.
- Map out test points and reference indicators.
- Warn against potential hazards by placing regulatory symbols or voltage warnings.
- Display version numbers or custom branding.
Silkscreen PCB Printing Techniques and Types

Modern silkscreen pcb printing techniques have evolved way beyond the manual stencil processes of the past. Here’s how silkscreen is applied to the pcb in contemporary manufacturing:
1. Manual Screen Printing
A physical stencil (screen, often made from polyester) is custom-made to match the silkscreen design. Ink is spread across the stencil and pressed onto the surface with a squeegee.
- Pros:Simple, suitable for prototypes and large line widths.
- Cons:Lowest resolution, slow, prone to smudging at small sizes.
2. Liquid Photo Imaging (LPI)
In LPI, photosensitive ink (typically non-conductive epoxy ink) is coated onto the PCB. A film with the silkscreen image is placed over the board and UV light is used to expose the desired pattern. The board is then developed and cured to leave only the silkscreened markings.
- Key Benefit:Much finer line width than manual screen printing.
- Common Use:The go-to production method for complex PCBs.
3. Direct Legend Printing (DLP)
DLP uses a digital file (from CAD) and an inkjet printer to deposit acrylic-based ink directly onto the pcb surface. UV light instantly cures the ink while it’s printed.
- Perfect for small batch, variable data and high-precision work.
- Drawback:Some surface finishes (like silver) may not allow good ink adhesion.
Silkscreen Types & Printing Technique Comparison
| Silkscreen Type | Best Use | Printing Technique |
| Manual Screen Printing | Low volume, prototypes | Stencil, squeegee |
| Liquid Photo Imaging | High volume, fine detail | UV light, developing |
| Direct Legend Printing | High-res, variable designs | Inkjet projector, digital CAD |
Key Information Silkscreen Provides on PCBs

Silkscreen provides much more than just part numbers. Here’s a detailed look at common silkscreen markings you’ll find on a PCB:
- [Reference Designators]:U1, R15, D4—indexable to the BOM and schematic.
- Component Outlines:Placement hints for connectors, buttons, switches, etc.
- Polarity Markings:For diodes, electrolytic capacitors and ICs.
- Pin 1 Indicators:Arrows, dots or notches for correct orientation.
- Test Points:Labeled “TP5” or voltage labels for diagnostics.
- Logos & Certification Marks:UL, CE, RoHS, company logos.
- Warnings:Symbols for ESD sensitivity, high voltage or thermal limits.
- Notes:Special instructions (e.g., “DNI”—Do Not Install).
Using silkscreen for these details improves not just assembly and troubleshooting for manufacturers but also empowers end-users, technicians and inspectors to rapidly understand the purpose, orientation and revision of every component on the PCB. This makes silkscreen on a printed circuit board a core element of quality control, documentation and field service.
The Silkscreen Process in PCB Manufacturing

How Is Silkscreen Applied to the PCB?
The application of silkscreen in the PCB manufacturing process ties many production steps together for a precise result:
- Designing the Silkscreen Using PCB CAD software, engineers define all the text, symbols, and markings required for the silkscreen layer. Careful planning ensures the silkscreen is the topmost layer in the final board stackup.
- Generating Silkscreen Data The silkscreen layer is exported—usually as a Gerber (.GTO for top, .GBO for bottom)—to be used by the fabrication house.
- Selecting the Printing Technique The right silkscreen technique (manual screen printing, liquid photo imaging, or direct legend printing) is chosen based on board complexity, production volume, and minimum line width required.
- Applying the Silkscreen
- For manual screen printing, a stencil and squeegee are used to apply ink directly onto the PCB surface.
- LPI involves exposing the PCB to UV light with the silkscreen image “masked” onto the board, then developing and curing the marking.
- For DLP, inkjets print the silkscreen directly, curing as it goes.
- Curing Process The board is developed and cured to fix the silkscreen in place, ensuring durability throughout the entire PCB’s lifetime.
- Final Inspection After printing on the PCB, trained inspectors (or automated optical systems) review the silkscreen for clarity, alignment, and accuracy—verifying every marking, reference, and symbol.
Designing the Silkscreen: Guidelines & Best Practices
A poor silkscreen can ruin an otherwise well-designed PCB. Follow these guidelines to ensure your silkscreen print on a PCB is legible and robust, supporting quality and long-term utility:
Best Practices for Silkscreen Design
- Minimum Text Height:Most fabs recommend at least 1.0 mm character height and 0.15 mm line width for clarity.
- Font Choice:Use plain, sans-serif fonts for best readability.
- Color Contrast:Choose a color with stark contrast against the solder mask—typically white on green, yellow on black, or black on white boards.
- Avoid Overlaps:Never allow silkscreen to cross solder pads or exposed copper. Overlapping can lead to soldering problems and assembly defects.
- Logical Orientation:Keep text readable from the primary orientation—don’t write upside down or sideways unless space is extremely limited.
- Component Clearance:Allow extra space around large or tall components to keep silkscreen visible after assembly.
- Symbols and Icons:Use industry-standard symbols for voltage, polarity, test points, ESD, etc.
- Layer Accuracy:Ensure that silkscreen images don’t fall off the surface of the PCB or outside the physical board outline when panelizing.
Special Silkscreen Tips for Different PCB Types
While most of the above applies to standard PCBs, specialized boards call for extra attention:
- High-Density PCBs: Use DLP for the highest resolution labels. Consider abbreviating reference names if space is critical.
- Flexible Circuits: Only flexible-compatible inks should be used for silkscreen on a flexible circuit. Avoid large, solid symbols that may crack on repeated bends.
- Boards with Complex Surfaces: On PCBs using odd shapes (like embedded antennas or custom panels), ensure that the silkscreen doesn’t intrude upon sensitive RF, power or exposed areas.
- Custom Branding or Barcodes: DLP and LPI allow printing of QR codes, custom graphics or multi-language notes, boosting the PCB’s traceability and customer engagement.
- Quick-Turn PCB Orders: For rapid prototyping, you might forgo bottom side silkscreen to expedite delivery, but always ensure the most crucial information remains on the top silkscreen layer.
Silkscreen and Your PCB Manufacturer: Collaboration for Quality

- Share your Final Silkscreen Files:Use Gerber file format for each silkscreen layer (top and, if needed, bottom) and annotate any critical notes with supporting PDFs.
- Consult Early:Especially for unusual requirements or large-volume production, ask your manufacturer about their preferred silkscreen PCB printing techniques, ink types and minimum text size.
- Prototype First:For new designs, a prototype run will verify that all silkscreen data appears clean and legible on your finished PCB.
- Ask for Automated AOI:Modern fabs have automated optical inspection to help ensure that the silkscreen is clear and correctly matches the design.
The Future of Silkscreen on Printed Circuit Boards
Silkscreen on PCB fabrication is evolving with manufacturing technology:
- Digital-first workflows:Advanced CAD and digital legend printing allow ultra-fast, variable-data silkscreening, perfect for version changes, unique serials and small batches.
- Eco-Friendly Inks:There’s a trend toward lead-free, low-VOC and water-based inks to make the PCB production process greener and safer.
- Traceability and Smart Markings:QR codes and barcodes printed with DLP are becoming commonplace, supporting total lifecycle tracking and easy user interaction.
- Automation:The integration of silkscreen printing into the complete PCB assembly process is reducing defects, increasing consistency and optimizing overall board quality.
Conclusion: Why the Right Silkscreen Matters
The silkscreen layer on a printed circuit board is not just ink on fiberglass—it’s a vital communication tool interfacing human intelligence with digital electronics. When you invest in robust and readable silkscreen for your PCB, you’re investing in:
- More efficient assembly and testing processes
- Greater safety and operational reliability
- Fewer field failures and technical support calls
- Stronger branding and intellectual property protection
Adhering to PCB design standards is fundamental to ensuring silkscreen quality. Whether opting for traditional screen printing, liquid photo imaging or direct legend printing, high-quality silkscreen craftsmanship provides clear assembly references and reliable inspection benchmarks throughout the entire PCB manufacturing process, while establishing distinct process standards. Starting from the best practices mentioned above, close collaboration with manufacturers ensures that the PCB silkscreen layer continuously fulfills its functions of identification, guidance and maintenance support during the board’s assembly, debugging and long-term use, thereby genuinely delivering effective support for the product’s full lifecycle.