
Introduction: Why Build a Custom Keyboard?
If you’ve ever typed on a mechanical keyboard and wondered If creating your perfect typing experience—one thing matches your sound and feel preferences, your workspace style, and your work flow—then building your own keyboard is a hobby you will like.
The custom mechanical keyboard are widely popular. Brands such as Keychron offer ready-made keyboard kits, switches and keycaps, making self-built keyboards easier to get started with. Gamers chasing responsive keystrokes, programmers prioritizing typing comfort, and heavy typists alike can tailor layout, switches, keycaps and typing sound freely. Picking a case, lubricating switches and every other step craft your exclusive typing feel.
Getting Started: The World of Keyboard Building
The Keyboard Hobby and Community
Now is the perfect moment to dive into keyboard culture. Enthusiasts gather at offline events, Discord channels and YouTube tutorials to share tips, showcase builds and fix issues with fellow hobbyists.
Begin by visiting stores like Micro Center to test switches and keycaps in person. Most beginners opt for barebones kits containing a case, plate and PCB. No soldering is needed—just mount preferred switches and keycaps to craft your custom board.
Understanding Keyboard Anatomy: All Major Components Explained
Build a custom keyboard, we need to know each critical part and what role it plays in our writing experience:
| Component | Role |
| Keyboard Case | The outer shell, which determines weight, acoustics, and durability. Aluminum or FR4 cases are premium choices. |
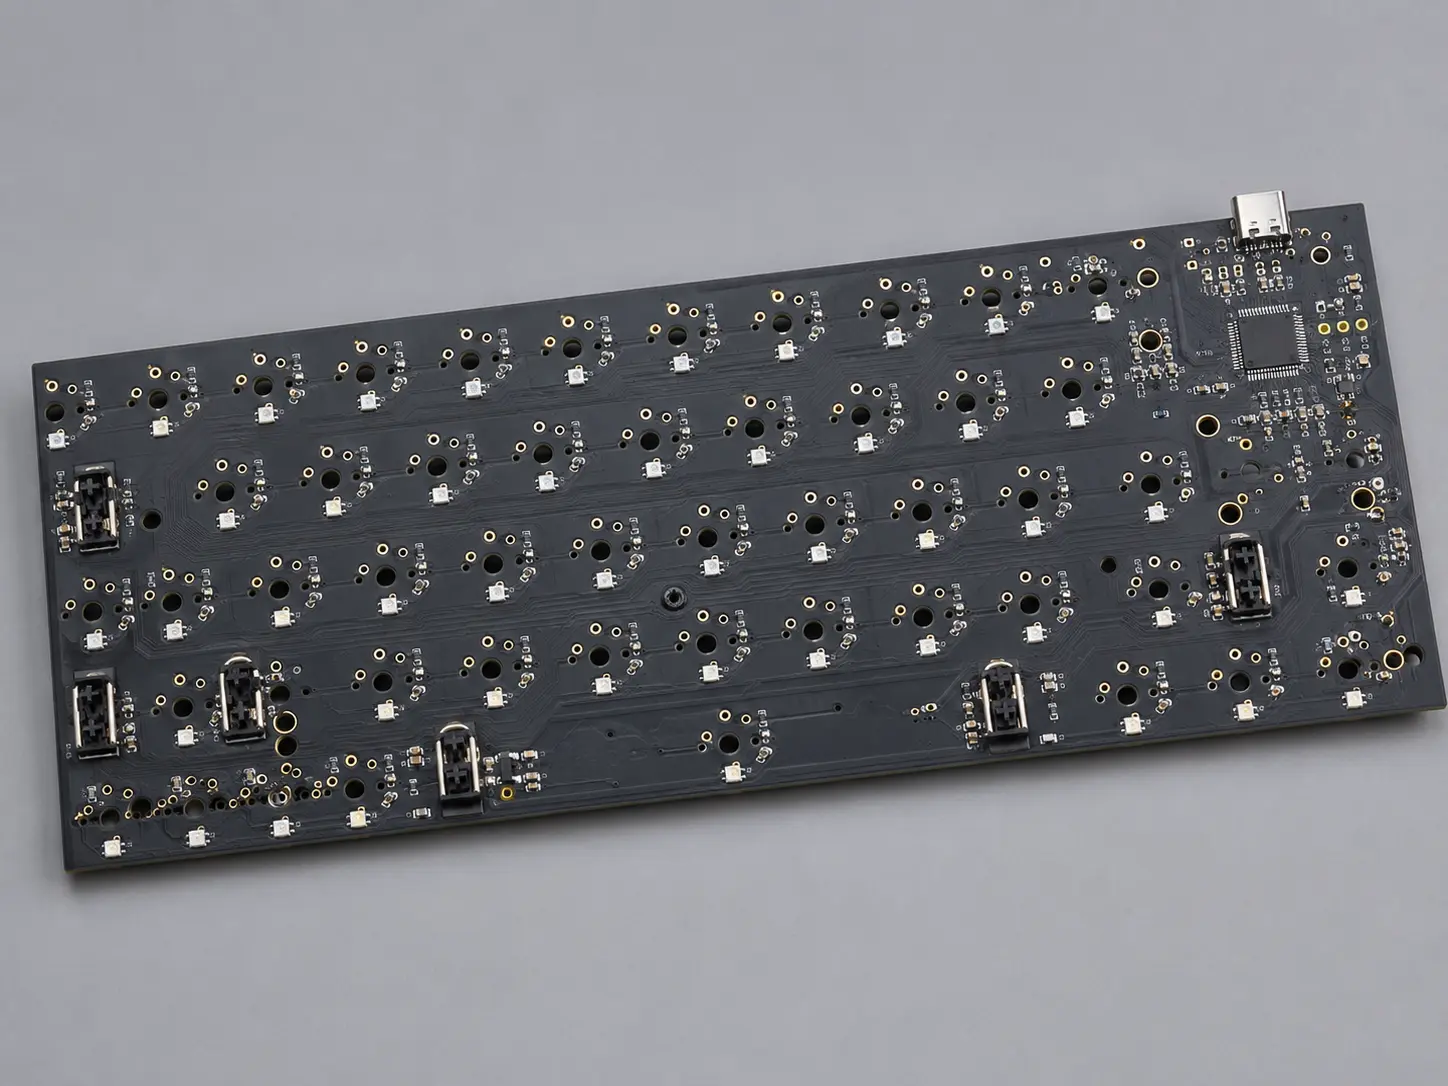
| PCB (Printed Circuit Board) | The electronic brain that detects every press, connects to your computer, and can be hot-swap or soldered. |
| Plate | Holds the switches firmly in place, adds structure, and influences sound. Choices include aluminum, brass, polycarbonate, FR4. |
| Switch | The main “feel” component of a keyboard. Options include tactile, linear, clicky, or silent; each with a unique switch sound profile. |
| Keycaps | What you touch—with differing profiles, materials, sound, and visual flair. Keycap quality can transform typing feel. |
| Stabilizer (Stab) | Stabilizes larger keys (spacebar, enter, shift) for even, rattle-free sound and feel. Screw-in stabs are best for stability. |
| Foam/Dampeners | Between PCB and case or plate for further sound tuning. Popular for achieving a deep “thock.” |
Choosing Your Parts: PCB, Keyboard Case, Switches, and Keycaps

PCB Types and What to Look For
Hot-swappable PCBs let you swap switches without soldering, ideal for newbies and frequent switch testers. Soldered boards demand more work yet support more layouts and offer superior long-term durability.
Popular PCB features:
- RGB underglow/side lighting
- VIA/QMK support for easy remapping in a keyboard configurator
- Compatibility with screw-in stabilizers
Keyboard Case
Your case is the heart of your build’s durability and visual appeal. Aluminum, FR4 and polycarbonate are mainstream case materials. Aluminum delivers premium texture, weight and resonant sound. Plastic or acrylic cases suit budget, lightweight builds and sound nice after tuning.
Switches and Keycaps
This is where you truly customize and set yourself apart! Mix and match tactile, clicky, or linear switches; we can combine them with different keycap profiles and artisan keys for endless variety.
Keyboard Layouts: 60%, 65%, 75%, TKL, Full-Size, and More
Keyboard layouts are one of the most important choices for both workflow and style. Here’s a comparison of the most popular options:
| Layout | Description | Pros & Cons |
| 60% | No F-keys, arrows, or (sometimes) navigation. Compact and portable. | Minimalist; missing keys for some users |
| 65% | Adds arrow keys + a few navigation keys. | Great for coders/gamers needing navigation |
| 75% | Adds function row in a compact, single-block design. Like keychron and many gaming keyboards offer this. | Full functionality, compact footprint |
| TKL | “Tenkeyless”—full-size minus number pad. | Mainstream all-rounder/office layout |
| Full-size | Everything: F-rows, arrows, navigation, number pad, and space for macro keys. | Hefty, best for spreadsheet/data entry |
A 75% keyboard, like the Inland Gaming MK Pro 75% keyboard, gives an ideal blend of all-in-one features and a smaller desk footprint.
Switches: Types, Brands, and What’s Right For You
Your keyboard switches make or break the typing feel, and heavily shape the sound profile of your build.
The Three Big Switch Types:
- Linear switch: Smooth press, no bump, no click. Best for gaming and fast typists.
- Tactile switch: Noticeable bump at the actuation point. Communicates when a key is pressed—a favorite for writers who want feedback but not too much sound.
- Clicky switch: Distinct tactile bump PLUS an audible click. Love it or hate it: extremely satisfying for some, annoying for others (and office neighbors!).
Must-Try Switches and Use Cases
| Switch Type | Example | Best For | Sound/Feel |
| Linear | Gateron Yellow, Cherry MX Red/Black | FPS gamers, fast typists | Quiet, smooth, consistent |
| Tactile | Cherry MX Brown, Zealio V2 | Writers, coders | Gentle bump, moderate sound |
| Clicky | Cherry MX Blue, Kailh Box White | Retro lovers, typists | Loud click, positive bump |
Hot-Swap and Soldered Switches
- Hot-swap PCB: Install/remove switches using a switch puller—no desoldering needed.
- Soldered PCB: Attach switches with a soldering iron, offers broader layout support and slightly more stability with fewer possible socket failures.
- Desoldering: Useful if you want to swap switches later on a soldered build—tools like a solder sucker help with this.
Keycaps: Materials, Profiles, and Style

No element of your keyboard build lets you express your personality like keycaps. The keycap material, shape (profile), color, and legend style all matter for your typing experience and your build’s aesthetics.
Keycap Materials
- PBT keycaps: Durable, textured, resist shine, and typically provide a deeper, “thockier” sound profile. Most custom keyboards, especially those built for premium feel and sound, use PBT.
- ABS keycaps: Smoother texture, vibrant legends, but prone to developing a shiny surface with heavy use. Great for retro or classic looks.
- POM keycaps: Less common, but very smooth and resistant to wear—an appealing option if you want silky feel and a unique touch on your first keyboard.
Keycap Profiles
The profile is the shape and contour of your keycaps across rows. Popular options include:
- Cherry: Low, sculpted—beloved in the keyboard hobby for comfort and classic appearance.
- SA: Tall and spherical, provides a vintage feel and resonant sound.
- DSA: Uniform, low-profile, great for creative layouts.
- OEM: The “default” for most gaming keyboards and office keyboards.
Artisans, Accent Keys, and Theming
Building and customizing doesn’t stop at stock keycap sets. Many in the custom mechanical keyboard community add artisan keycaps—single, sculpted or hand-painted keys—to their escape, spacebar, or arrow keys to make a statement.
You can also theme your new keyboard with muted colors for an office setup or go bold with vibrant, multi-colored sets. Many keycap sets are now in-stock year-round, though limited-run group buys for GMK, MT3, or KAT sets remain popular for enthusiasts.
Step-by-Step Build Process: Building and Customizing Your Keyboard

If you’re want a keyboard tailored to your typing feel, workflow and preferences? Below is a full assembly guide, compatible with both hot-swappable and soldered PCBs..
1. Unbox and Organize
Lay out all kit parts—PCB, plate, case, switches, stabilizers, keycaps—on a clean mat. Prepare screwdrivers, pullers and tweezers for assembly.
2. Test Your PCB
Before moving forward, always test your PCB to ensure all keys register. Plug it into your PC and use a keyboard tester or compatible keyboard configurator like VIA. Briefly bridge each switch socket with metal tweezers to check for a registered press—crucial for not having to disassemble later.
3. Prep and Install Stabilizers (Stabs)
Stabilizer type and tuning defines your large key feel.
- Choose screw-in stabs if your PCB supports them; they’re less likely to rattle.
- Lube your stabilizers with 205g0 or dielectric grease—lubing your switches and stabilizers will create a buttery, quiet sound.
- Clip, mod, and seat your stabs correctly on the PCB. Special attention to the spacebar—a well-lubed and balanced stab here provides a premium feel and sound.
4. Insert Switches
For a hot-swap PCB:
- Align each switch pin with the socket and press firmly. Start with the four corners and space bar for plate alignment, then fill in the rest.
- Try different switches and keycaps on certain rows for a truly customized build.
For a soldered build:
- Seat all switches (check pin alignment!), hold the plate/PCB in a third hand or up on a work surface.
- Heat your soldering iron, touch the tip and solder wire to the contact pad and switch pin, hold for 1–2 seconds, and remove. Repeat. Take your time!
- For mistakes, use a solder sucker for desoldering and start again.
5. Assemble the Case
Place the PCB/switch/plate sandwich into the keyboard case. Add foam (optional) between the PCB and case for premium acoustics and a refined sound profile. Gasket mount builds use strips of silicone or foam for a distinctive soft, flexy typing experience.
Secure the case with screws from your keyboard kit, and keep everything snug but not overtightened.
6. Install Keycaps
Use your keycap puller and carefully press on your keycap set row by row. Double-check for the correct size keys (especially if using a non-standard layout or split space bar). Accent keys or artisans can be added now. Mix and match for a look that fits you!
7. Testing and Tweaks
Plug in your keyboard and run another keyboard tester. Try every key, especially those on stabs and the spacebar. Adjust any switches or keycaps that feel off.
Tuning and Mods: Lubing Switches, Stabilizers & More
The step that makes your build stand out: the mods.
Lubing Your Switches and Stabs
Lubing switches increases smoothness, reduces “scratchiness,” and offers richer sound and feel.
- Use 205g0 for tactile and linear switches; for clicky switches, a lighter application or factory lube may suffice.
- Lubing is a careful process—open each switch (a switch opener helps), apply a small trace of lube to the stem, spring, and leaf.
- Lost spring ping or harsh travel? Lubing solves it.
Hydrate your stabs! Even inexpensive boards benefit from lubing stabilizers—especially under the space bar.
Sound Dampening & Advanced Mods
- Case foam between PCB/case, plate foam, or switch films—these all affect overall sound profile and eliminate hollowness or ping.
- O-rings under keycaps are a cheap mod to soften bottom-out sound and feel—try it if you like a quieter typing experience.
- More advanced? Experiment with the tape mod (masking tape under the PCB) or PE foam mod (between PCB and plate).
Firmware, Testing, and Key Remapping
A major benefit of a custom build is software customization. Many PCBs support open-source firmware like VIA or QMK.
- Key remapping: Assign macros, change layouts, set up layers for media/function keys. The keyboard configurator makes this drag-and-drop easy.
- Lighting: Control RGB, define per-key colors, and create custom animations.
- Testing: After programming, use a keyboard tester or remap tool to confirm every key, switch, and macro works.
Troubleshooting, Repairs, and Maintenance
Common Issues and How to Fix
Key not registering: Hot-swap: Remove, inspect for bent pins, reseat switch in the socket, or try a known-good switch. Soldered: Look for cold solder joints, correct with soldering iron or desolder/reflow.
Stab rattle or mushy large keys: Re-lube, or upgrade to screw-in stabs and retune.
Odd sound profile: Add/adjust foam, check for loose switches or keycaps.
Lighting or PCB failure: Check all connections, cables, and try a different USB port.
Maintenance Tips
- Regular cleaning: To remove dust from the keyboard case with a brush or blower.
- Deep clean: Remove and wash keycaps every few months. Clean and relube switches and stabs as needed.
- Protect your build: Use a keyboard cover or gaming keyboard carrying case for transport.
Resources, Tips, and Joining the Keyboard Community
- Reddit: r/MechanicalKeyboards for advice, build logs, and Q&A.
- Vendors: Micro Center for in-stock kits, switches and keycaps; KBDFans, Drop, and NovelKeys for specialty parts.
- Discord/YT: Join Discord servers or follow streamers like Taeha Types and Alexotos for live builds, modding, and reviews.
- PCBs and assembly: For group buys or building custom with unique PCBs, vendors like LHDTECH offer prototype manufacturing and turnkey PCB assembly.
Conclusion: Your Custom Keyboard Journey Begins!
The process of building a custom keyboard is both rewarding and empowering. You’ve learned how to:
- Select the right keyboard kit, PCB, switches and keycaps for your desired layout and functionality.
- Lubricate, mod, and fully customize your sound profile, typing feel, and unique look.
- Gather essential tools: screwdrivers, soldering iron (if required), and VIA software for remapping keys.
- Troubleshoot, upgrade, and maintain your board for years of smooth, satisfying use.
Every keyboard build is different, just like every typist. Whether you crave clicky, tactile, or silent switches and keycaps—or want the thockiest space bar in your entire office—the journey is yours to create.