

What Is Solder Wick? | Solder Wicking and Desoldering Braid Explained
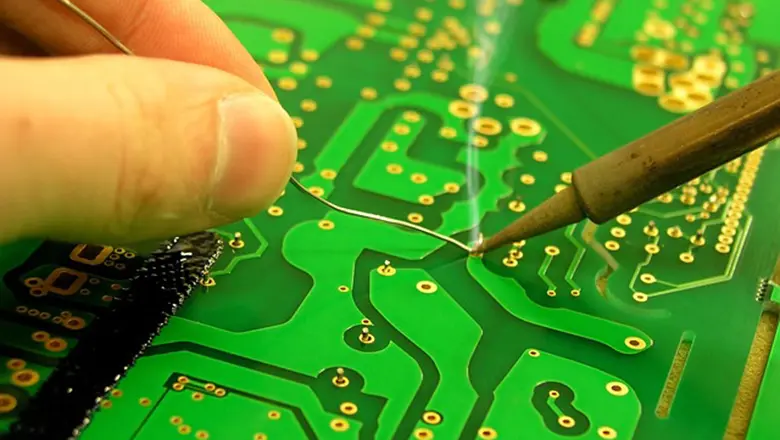
Solder wick, sometimes called desoldering wick or desoldering braid, is one of the most important tools for anyone working with electronics. A solder wick is a tape-like strip formed from fine strands of copper wire, typically braided together into a flat, flexible ribbon. This copper braid, sometimes referred to as a solder braid or simply “braid,” acts as a pathway for solder to flow away from a joint when heated.
At its core, solder wick works by taking advantage of capillary action—that remarkable scientific phenomenon where liquid solder is drawn up through the weave or mesh of the copper braid, just like water wicks up a napkin. The fine, pure copper wire means high electrical and thermal conductivity, delivering better heat transfer between your soldering iron tip, the pad, and the wick. If you spend any time messing around with circuit boards, desoldering wick is one of those things you’ll always want within arm’s reach. Whether you’re touching up a joint, scraping crusty old solder off a component lead, or prepping pads so you can drop in a new part, that little copper braid is what pulls the excess solder off your PCBs (printed circuit boards). And it’s surprisingly versatile – from fixing a tiny solder bridge between two legs on an SMD (surface‑mount device) to breathing new life into a vintage piece of gear full of through‑hole components, you’ll find yourself reaching for it again and again. Most of the braid you buy already comes impregnated with flux, and that flux is there for a reason: it attacks any oxide layer sitting on the surfaces. Once that oxide is gone, the heat from your iron lets the molten solder flow right into the weave of the wick, soaking it up quickly and cleanly – no fuss, no mess.
Characteristics, Benefits, and Drawbacks of Solder Wicks

Key Characteristics
- Material: The best solder wick is made from high-purity copper, which can be either bare or tinned. Fine strands ensure fast wicking action and minimal pad lifting.
- Weave Density: Wicks come in tightly or loosely woven patterns. Tight weaves provide greater absorption, while loose weave allows for flexibility in tight PCB spaces.
- Width: Wick is available in widths from 0.8mm up to 5mm. The right width matches the width of the pad or joint you need to clean.
- Flux Content: Solder wick comes with rosin flux, no-clean flux, or unfluxed. Flux on the wick helps dissolve oxides and enables solder to melt quickly for fast removal.
- Length & Packaging: Most hobbyists and professionals use bobbins—small reels or spools—ranging from 1.5m up to 15m. You’ll see Chemtronics, MG Chemicals, and generic brands like those on Aliexpress.
Advantages of Using Solder Wick
- Pinpoint Solder Removal: One of the main advantages is the ability to remove solder exactly where needed. This is essential for SMD component pads and BGA (ball grid array) sites.
- Low-Risk of Board Damage: Gentle heat transfer and no suction motion mean less risk of board damage, especially on delicate traces.
- Compatible w/ All Solder Types: Works with both leaded and lead-free solder thanks to the right flux.
- Residue-Free Options: Modern no-clean fluxes make post-desoldering cleaning optional in many cases.
- Reusable Bobbins: You can buy a large bobbin to have on hand for years, just store properly to avoid oxidation.
Drawbacks and Limitations
- Single Use per Section: Once a length of braid is saturated (filled with old solder), it must be trimmed away. Trying to reuse that used section will not only fail to remove solder, but may also cause heat buildup or residue issues.
- Flux Residue: Rosin-based braid can leave sticky, hard-to-clean residue which may attract dust. No-clean wick is better for high-density and sensitive PCBs.
- Slower than Pump for Large Joints: For heavy through-hole connections, a solder sucker/pump often removes bulk solder faster than wick but less cleanly.
- Shelf Life Concerns: Copper can oxidize. Proper storage is key for long-term usability.
Types of Desoldering Wicks: Which One Should You Choose?
List of Common Desoldering Wicks
| Brand / Type | Widths | Flux | Use Case / Notes |
| Chemtronics | 0.8-5mm | Rosin/No-clean | All-purpose, premium quality, anti-tarnish treated |
| MG Chemicals | 0.8-4.5mm | No-clean/Rosin | Affordable, great for both heavy and fine-pitch work |
| Goot | 1-3mm | No-clean | Popular in professional repair shops, long bobbin life |
| Generic (Aliexpress, etc.) | 0.8-3mm | Mixed | Budget-friendly, check for proper flux and purity |
Notable Variations
- Rosin-based wick: Powerful but may need cleaning.
- No-clean wick: Leaves little or no residue; ideal for modern electronics and conformal coating.
- Unfluxed wick: Used when you wish to control the type of flux exactly—just brush or apply flux manually.
- Ultra-Fine Wick: For micro soldering, IC leg de-bridging, or cellphone repair.
How to Choose the Right Solder Wick for Your Project
When choosing solder wick, keep these factors in mind:
- Width: Pick a width slightly wider than the pad or trace you plan to clean. For SMD pads, 0.8-1.5mm is ideal; for through-hole, 2.0-3.0mm.
- Length: Bobbins come in lengths from 1m to over 15m. Occasional users can get by with 1.5-3m spools, but high-volume or industrial techs should buy larger rolls.
- Flux Type: If post-cleaning is a challenge, buy no-clean wick. If you need extra cleaning power, go with rosin-based or add flux manually.
- Copper Quality: Look for anti-tarnish treatments in premium brands (Chemtronics, MG Chemicals) as these provide longer shelf life and consistent performance.
- Specific Use Cases: If you’re doing cellphone or micro-repairs, get the finest available width (around 0.5mm). For large connectors or ground planes, wide, thick braid delivers capacity and faster solder removal.
Essential Tools and Supplies for Using Solder Wick

To properly use solder wick and achieve quality desoldering, you’ll need a few tools and supplies beyond just a reel of braid. Here’s a checklist for any effective desoldering setup:
- Solder Wick / Desoldering Wick: Ensure you have the right width and type for your task. Store extra bobbins of Chemtronics or MG Chemicals wick for varied jobs.
- Soldering Iron: Use a temperature-controlled iron, ideally with a clean, tinned iron tip tailored to your joint size. A fine point is best for SMD pads; a chisel tip is better for through-hole work needing broad heat transfer.
- Flux: Gel flux, liquid flux pens, or paste—additional flux application aids the wicking process. Most wicks come with flux, but extra flux on the wick helps optimize results in tough cases, especially with old solder.
- Pair of Tweezers: Essential for holding or positioning both the wick and small components.
- Good Quality Cutters: To trim away used sections of solder wick after each wicking operation.
- Isopropyl Alcohol & Brush: For cleaning rosin or residue after desoldering.
- Safety Glasses: To prevent injury from molten solder spatters.
- Fume Extractor: Particularly vital when working with rosin flux to draw fumes away from your face.
- Bobbin Holder: Keeps your wick neat and prevents waste.
Proper Technique: How to Use Solder Wick (Step-By-Step Process)

Let’s break down the step-by-step process to use solder wick effectively for any soldering process:
Step 1: Heat Preparation
Set your soldering iron temperature appropriately:
- Lead-based solder: 300–340°C
- Lead-free solder: 340–375°C (since it takes a higher temperature for the solder to melt)
Step 2: Tin the Iron Tip
A well-tinned iron tip is crucial for rapid heat transfer and to prevent oxidation. This also makes it easy to wick old solder without excess force.
Step 3: Apply Flux
Even if your wick comes with flux, adding flux improves performance. You can use a flux pen, gel flux, or liquid flux. Additional flux on the wick ensures efficient capillary action and solder capacity, leading to cleaner results.
Step 4: Position the Wick
Lay the solder wick (desoldering braid) directly over the solder joint or pad. Use a pair of tweezers for fine placement, especially for SMD work.
Step 5: Iron on Top
Place the soldering iron on top of the wick, right above the area of solder you want to remove. The iron should gently press the wick into the joint.
Step 6: Let the Solder Flow
Hold steady while the solder will melt, and you’ll see liquid solder quickly wick into the copper braid. This is capillary action in action—wicking draws solder from the pad directly into the weave.
Step 7: Remove the Wick
Lift both iron and wick together as soon as the solder is gone. Never slide or drag the braid, as that can lift pads or traces. If the wick sticks, reduce heat or add flux.
Step 8: Remove Used Section
After each use, always cut away the used section from your solder wick to avoid contaminating new joints with old flux and solder.
Step 9: Clean the Area
Use isopropyl alcohol and a brush to clean up any remaining flux residue—critical if you used rosin-based wick.
The Importance of Flux in Solder Wicking
Flux is a game-changer when you use solder wick. All types of flux (rosin, no-clean, water-soluble) have unique strengths:
Why and When to Apply Flux on the Wick
- Removes Oxide: Flux dissolves surface oxides that prevent solder from flowing.
- Improves Wetting: Flux creates a surface where molten solder can move freely, making it easier to remove solder or form new solder joints.
- Lowers Melting Point: Flux slightly lowers the melt temp, ensuring fast wicking action and reducing the risk of thermal damage to the board.
Types of Flux and Their Applications
| Type of Flux | Application | Pros | Cons |
| Rosin | General electronics | Powerful, great for old joints | Needs cleaning, residue left |
| No-clean | SMD & high-density boards | Leaves minimal residue | Slightly less aggressive |
| Gel | Precision rework & QFN/IC | Stays put, targeted use | Can be sticky |
Application of Desolder Wick in Electronics and PCB Repair
Solder wick is a must-have for a range of desoldering situations:
- Removing Solder Bridges: Wick excels at removing excess solder between SMD pins/IC leads.
- Component Replacement: Use solder wick to clear pads or via holes when desoldering and swapping connectors, ICs, or through-hole parts.
- Pad Preparation: Cleans pads before applying new solder paste for SMD soldering process or before reballing BGA chips.
- Clearing Solder from Vias: Often electronics techs face via holes filled with solder; a copper braid with plenty of flux is the best way to open them.
- Restoring Damaged Boards: Gentle wicking action lets you remove damaged or corroded solder without further damage to the board.
How to Prevent and Solve Common Problems With Solder Wicking

Most-Common Issues
- Wick Sticking / Pad Lifting: Too much heat or holding the iron too long will cause damage to the board. Always wick with care and use the thinnest braid practical.
- Solder Won’t Wick: This happens when the braid is oxidized, not enough flux is present, or you’re using a too-cold iron. Add flux on the wick or replace with fresh braid as needed.
- Poor Wetting: Dirty iron tip, old solder, or lack of additional flux are usually to blame. Clean the iron tip and try again.
- Remaining Solder: Sometimes solder bridges or large pads need more than one pass. Always switch to a new section of braid and add flux to improve wicking.
Advanced Tips & Best Practices for Solder Wicking
- Preheat Large Boards: Preheating helps get the solder to flow faster and prevents solder from flowing beneath pads.
- Use a Desoldering Wick for Small Joints: It’s ideal for micro rework, such as SMD and fine-pitch IC leads.
- Touching the Wick Properly: Ensure you gently touch the wick on top of the solder. Minimal pressure prevents pad damage.
- Always Wick With Flux: Don’t be shy—flux worked into the braid ensures a clean finish. Using wick without flux can lead to incomplete wicking.
- The Best Brands Make a Difference: Chemtronics and MG Chemicals are known for consistent, residue-free results.
- Trim Used Wick Sections: Once the braid becomes discolored or saturated, cut away the used section before using wick again.
Verifying the Quality of Solder Wicking
After using solder wick, assess your work by:
- Visual Inspection: A good solder wick leaves bright, shiny, flat pads with no leftover blobs.
- Continuity Checks: Use a multimeter to verify clean contact and no solder bridges remain.
- Cleaning: No-clean shouldn’t need further work, but rosin must be wiped away with alcohol.
- AOI or X-Ray: For mission-critical boards, automated inspection confirms the board’s integrity post-wicking.
Solder Wick Maintenance and Storage
To keep your wick effective:
- Storage: Keep in a dry, sealed bag or container. Add a silica gel packet if storing for long periods.
- OXIDIZED WICK: If the copper braid turns green or brown, it’s oxidized and won’t wick properly—discard it.
- Bobbin Care: A covered bobbin protects unused wick from dirt and moisture.
Avoid Touching Bare Braid: Oils from your skin speed oxidation; use a pair of tweezers or wear gloves.
Solder Wick vs Desoldering Pump & Alternative Methods (continued)
| Tool | Strengths | Weaknesses |
| Solder Wick | Precision, flat pads, gentle on PCB traces; excellent for removing solder bridges and cleaning SMD pads; enables targeted removal of small amounts of solder; compatible with IC, SMD, and through-hole work | Consumes braid with each use, can be slow for large volume joints, requires frequent replacing of used section |
| Solder Sucker | Fast removal of large blobs of solder, especially useful for through-hole component desoldering | Less precise, can cause pad lifting if misused, usually unable to clear residue for SMD or BGA work |
| Hot Air Guns | Great for removing SMD ICs and reflowing solder without contact | Can be excessive for delicate PCB repair, may affect nearby components, does not remove excess solder directly |
When to Use Each Tool:
- Use a desoldering wick for cleanup after component removal, for solder bridges, and for when you need the joint completely flat.
- A solder sucker is ideal for initial bulk solder removal, especially from through-hole or multi-layer boards.
- Combine both for maximum effectiveness: Solder sucker for “gross” removal, solder wick for clean-up.
Frequently Asked Questions about Solder Wick & Solder Wicking
Q: How does braid remove solder?
A: The fast wicking action results from capillary action and solder capacity. The copper strands draw the liquid solder up into the weave, away from the pad/joint, pulling the molten solder out as the iron tip heats the wick on top of the solder.
Q: Can you use solder wick on lead-free solder?
A: Yes, just be sure your iron is set to the higher temperature needed to melt lead-free solder. No-clean wicks are especially helpful when using lead-free.
Q: Which width should I pick?
A: The best result comes from choosing a width that matches the width of the pad or joint you’re cleaning—just wide enough to cover but not so wide that it spreads heat too much.
Q: Does aluminum braid work?
A: No. Only copper braid has the proper capillary action, heat transfer, and malleability needed for safe, effective desoldering.
Q: Should I add additional flux if my wick is pre-fluxed?
A: Absolutely! Added flux improves performance and makes it easier to melt the solder and enable quick solder removal, especially for stubborn joints or old solder.
Q: Why does my wick seem to stop working?
A: Most often, because the used section is saturated with solder, or the wick is oxidized. Always cut away used portions, and keep your supply fresh.
Case Studies and Real-World Examples
Example 1: Solder Wick in Professional PCB Assembly
A technician at a PCB assembly house frequently uses Chemtronics Soder-Wick for SMD rework. When short circuits from solder bridges occur between IC pins, applying extra no-clean gel flux with a fine applicator, then using a 1.5mm width braid, removes the bridge cleanly without damage to the board. The technician always cuts the used section, applies additional flux before each use, and supports the board from behind with a heat-resistant mat—showing how best practices make a difference in reliability.
Example 2: Vintage Radio Restoration
Restoring a 1970s tube radio, a hobbyist finds large amounts of oxidized, old solder at through-hole points. Using MG Chemicals rosin-based 2.5mm width wick (with extra flux added!), the solder melts and flows quickly into the copper braid, making the process smooth and efficient. No damage to the classic board, and new components drop right in.
Example 3: Troubleshooting Failed Desoldering
A beginner tries to use a “cheap” wick with no flux purchased from Aliexpress and wonders why it takes forever to remove the solder. Upon switching to Chemtronics with no-clean flux and adding a little extra flux pen, the wicking action is instant. Lesson learned: Good quality, pre-fluxed copper braid and sufficient added flux worked wonders.
Conclusion: Best Practices and Benefits for PCB Quality and Reliability
Mastery of solder wick and braid techniques sets apart true electronics professionals. Making the right choice—like using Chemtronics or MG Chemicals products, choosing the correct width, and always adding a bit of flux—makes all the difference between a clean, reliable PCB solder joint and a costly board failure.
Summary of Pro Tips:
- Use a soldering iron with a tinned, clean iron tip.
- Always add flux—even if your solder wick comes pre-fluxed.
- Use the thinnest width effective for your pad size, and pick a braid that matches the width of your task.
- Remove the wick and iron simultaneously—never drag!
- Trim away the used section after every use.
- Store wick dry and sealed, always handling with a pair of tweezers to avoid oxidation.
- Inspect your work: pads should be flat, shiny and free from old solder, bridges or residue.
- Invest in good quality brands for consistent results—Chemtronics and MG Chemicals are reliable, and while Aliexpress may be tempting, quality can vary.